
Share this Image On Your Site
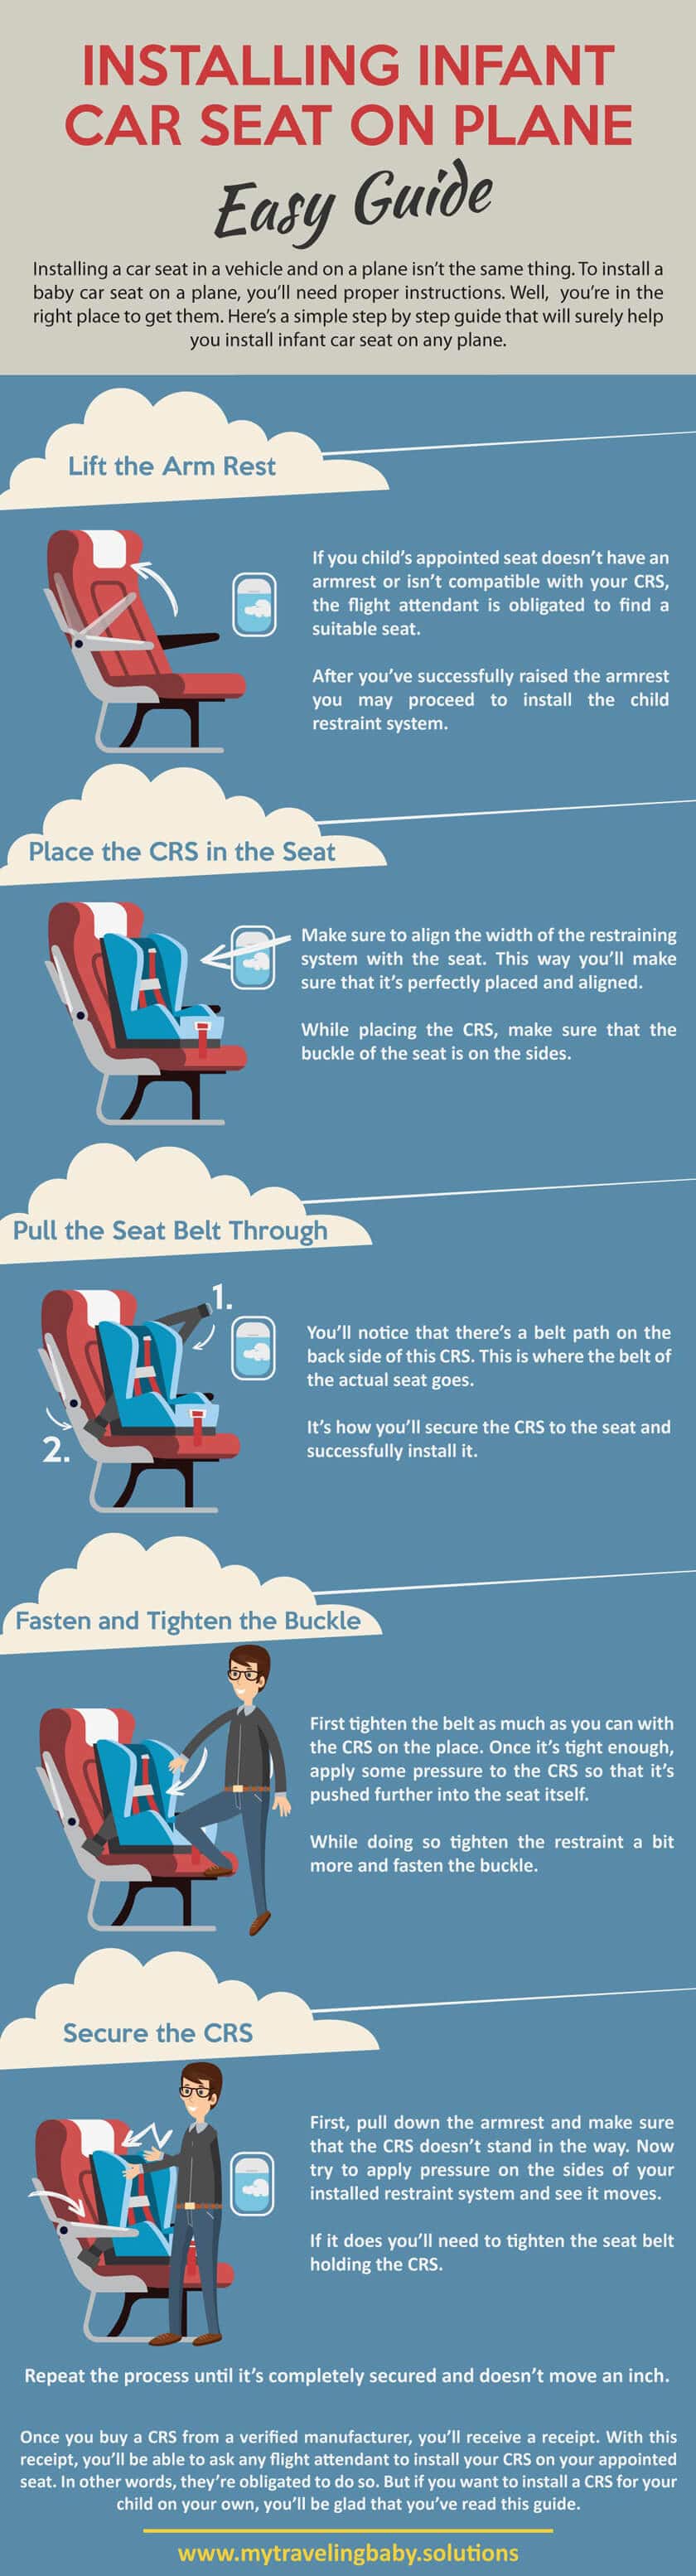
So you want to travel with your infant baby? That’s great. Whether you’ll want to fly or drive to your destination, you’ll need to secure your child by installing an infant seat. However, installing a car seat in a vehicle and on a plane isn’t the same thing. To install a baby car seat on a plane, you’ll need proper instructions. Well, you’re in the right place to get them. Here’s a simple step by step guide that will surely help you install infant car seat on any plane.
-
Lift the Arm Rest
The first thing to do is to lift the armrest. If you child’s appointed seat doesn’t have an armrest or isn’t compatible with your CRS, the flight attendant is obligated to find a suitable seat. After you’ve successfully raised the armrest you may proceed to install the child restraint system.
-
Place the CRS in the Seat
When everything is set and you can place the CRS, you can safely install it. Make sure to align the width of the restraining system with the seat. This way you’ll make sure that it’s perfectly placed and aligned. While placing the CRS, make sure that the buckle of the seat is on the sides.
-
Pull the Seat Belt Through
Now it’s time to pull the belt through the belt holder. You’ll notice that there’s a belt path on the back side of this CRS. This is where the belt of the actual seat goes. It’s how you’ll secure the CRS to the seat and successfully install it.
-
Fasten and Tighten the Buckle
Once you’ve pulled the belt through the back of the CRS, you’ll need to tighten and fasten it. First tighten the belt as much as you can with the CRS on the place. Once it’s tight enough, apply some pressure to the CRS so that it’s pushed further into the seat itself. While doing so tighten the restraint a bit more and fasten the buckle. Now release the CRS and make sure that it doesn’t fall out of place. If you’ve done it right, it should be tightly secure.
-
Secure the CRS
Your CRS is almost ready to accommodate your baby. But before you can place your baby in and secure the belt, you’ll need to secure the CRS. First, pull down the armrest and make sure that the CRS doesn’t stand in the way. Now try to apply pressure on the sides of your installed restraint system and see it moves. If it does you’ll need to tighten the seat belt holding the CRS. Repeat the process until it’s completely secured and doesn’t move an inch.
To Conclude
Once you buy a CRS from a verified manufacturer, you’ll receive a receipt. With this receipt, you’ll be able to ask any flight attendant to install your CRS on your appointed seat. In other words, they’re obligated to do so. But if you want to install a CRS for your child on your own, you’ll be glad that you’ve read this guide.